|
Welcome back!
This month we're going to talk about thumbnails (and as promised, I'll be more brief!). So, what are thumbnails? Well, animators often use the fingernails on their thumbs to animate with. If you use your thumbnails to click your mouse buttons instead of your forefingers, you get a much better result.
Wow, was that the all-time worst animation joke in the history of animation jokes? I think it must be, though I'd also hazard a guess that the "history of animation jokes" is probably pretty short.
Okay, so - for real now - what the heck are thumbnails?
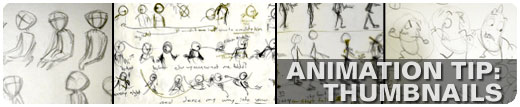
Basically, "thumbnail" is a term used to describe a small "thumbnail-sized" drawing that describes a pose, an action, or an idea.
The first rule of thumbnails is, don't talk about thumbnails.
Jeeeez. I just did it again. Second worst animation joke in the history of animation jokes. Sorry. It won't happen again, I promise.
Okay, the first rule of thumbnails is: LET THEM BE ROUGH.
They are SUPPOSED to look rough. They are not meant to be pretty pictures. Don't spend (waste!) a lot of time making each thumbnail look like a piece of art. Don't waste time shading it in, drawing all the little details, etc. They're meant to be fast and sloppy. The entire point of doing thumbnails is that it saves you time.
How does it save you time? Well, if you do thumbnails as part of your planning process, then you can work through all of your ideas BEFORE sitting down in front of the computer, and it's inarguably much faster to doodle a little stick-man doing a pose than it is to pose him out in the computer.
We use thumbnails to work through our ideas. To get past our first ideas (remember - your first idea is always the worst and most clichéd idea. The first idea you think of is probably the first and most obvious idea that the audience will think of too!), and get on to the ideas that count. The later ideas will be the good ones. They'll be the most inventive ideas, and the most original. But to reach those ideas, you'll first have to work through the clichéd ideas, right? Thumbnails are, without a doubt, the fastest way to do that.
The quickest road to a great idea, then, is through thumbnails!
When you get a new scene, sit down and start doodling. Maybe it's just poses. Maybe it's working out full actions. Either way, you're quickly discovering what will work and what won't, and it's all on paper. Quick and dirty - that's the way to do it. Use a stick-man, even. Many of the best animators do their thumbnails with what is essentially a stick-man. As long as you can see where the character's hips are, the angle of the hips, the angle of the shoulders, angle of the head, and the position of the limbs - that's ALL you need to know at this point, and you shouldn't be worrying about any other details yet, generally speaking.
So, the first rule is to stay rough, and the first *use* of thumbnails is to discover the best ideas for your shot.
The second use of thumbnails is to get fast feedback.
You can save yourself days of work (and a great deal of frustration) if you run your thumbnails past your lead or your director before diving into the actual scene. Nothing is more frustrating than spending 3 days blocking in something that you think is great only to find out, once the director gets a look at it, that you're doing something he doesn't like at all. It's always a great idea to run your thumbnails past them first, so you can save yourself the headache (and heartache!) of hearing the dreaded "start over" words from your director.
The third use of thumbnails is to translate your video reference.
Filming video reference is great, but as we talked about last time, you can't just coy it or you're going to end up with a scene that isn't as alive as it could have been. Thumbnails are a great way to translate that video reference into poses and timing that are infused with your knowledge of the art of animation. Sure, you can find some great posing and timing ideas in your video reference, but that's only step one. Whip out a sketchbook and start doing little stick-figure drawings of what you are observing (and STUDYING!) in the reference you're watching.
But as you draw those thumbnails, you can start to inject the principles of animation into them. Exaggerate the poses, push the lines of action in the body, and make the poses more dynamic and forceful. You can also jot down timing notes, and maybe you can even start exaggerating your timing at this stage. Right there in your thumbnails you can be making decisions about timing - give this part a little more ease-in, make that part a little snappier, etc.
The goal, as far as I'm concerned, is that before you sit down in front of your computer, you have a piece of paper or an exposure sheet that has dynamic and timed thumbnail poses, so you know exactly what pose will happen on exactly what frames. By the time you have turned on your computer, every major animation decision should have already been made. Without exception.
If you work this way, I guarantee you will end up with stronger, more dynamic, more communicative, and more memorable scenes than you would if you just sat down and started saving keys. Even better, I guarantee this entire planning process will save you time in the long run.
I think, as a general rule, I probably spend about 20% of my time planning. If I have a week to do a shot, I'll spend the first day completely away from the computer. A two-week shot might get 2 days of planning. If I only had 2 days to do a shot, then maybe I'd only spend 2 or 3 hours planning, but I would make the most of those couple hours. I'd spend it studying video reference, filming myself and my friends, doing thumbnails, etc. I do that because I know without a doubt that by spending that first day planning, I just saved myself a couple days (or more) worth of "noodling" the shot, and tinkering with it, trying to make it work.
Again, the best scenes I've ever done, and the ones I finished the quickest, are the shots that I spent the most time planning.
Over and out.
- Shawn
|